Whitehorse Mountain from Highway 530
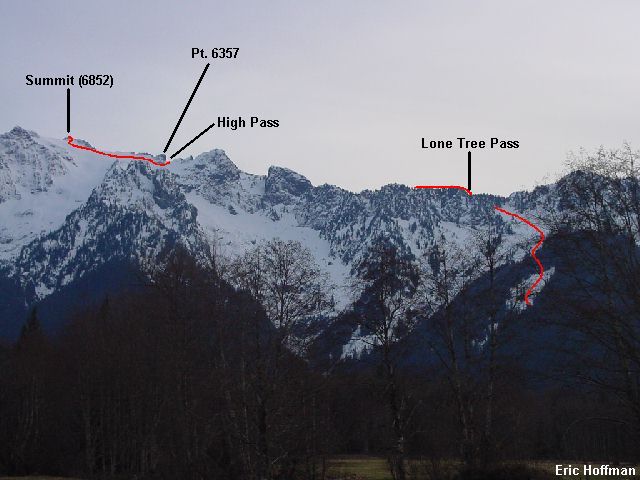
I had seen Whitehorse Mountain many times while traveling to or from Darrington and had contemplated climbing it in the past but I have to credit Chris with giving me the inspiration to go climb it on this sunny March day. Unfortunately, Chris didn't give me company on the climb, only inspiration. Everything needs to be good for an ascent of Whitehorse, the weather and more importantly the avalanche conditions. Everything was good on this day. Everything I had heard and read about the mountain seemed to suggest that aside from weather and avalanche condition, good route finding would be the key to a successful climb. The biggest difficulty seemed to be the traverse on the south side of the mountain, finding the gully leading to High Pass in particular. The view from highway 530 is helpful, but certainly incomplete.
|
Whitehorse Mountain from Highway 530 |
|
|
To get to the trailhead, take Highway 530 East from Arlington to 387th Ave NE / Mine Road (The Texaco for landmark drivers). Follow the paved road until it makes a sharp turn to the right and appears to dead-end at a Hill-Billy settlement, but don't be fooled. Pass the first Hill-Billy dwelling and make a left turn onto a narrow dirt road. A trail park pass is required to park at the trailhead, but don't bother getting one for now since the road is blocked by a fallen tree about a quarter of a mile from the trailhead. When I arrived at the fallen tree, there were two vehicles parked on a narrow shoulder. I backed up until I found a spot to park near a stream. The elevation was about 750 ft., far below the summit. After the road trudge, I arrived at the trailhead and started up. Using yoga and limbo techniques, I fought my way through the numerous downed trees, eventually reaching an open area at 2400 feet. On the way up I followed the route that the trail takes along the ridge, but a better way is to climb to the top of the open area, then traverse left a short distance through forest to a long wide open strip leading to the open slopes below Lone Tree Pass. If you take the ridge to tree line then traverse toward the pass, stay well below the lowest cliffs to avoid a rock/ice gully. The slopes leading to the pass are definitely prone to large avalanches.
|
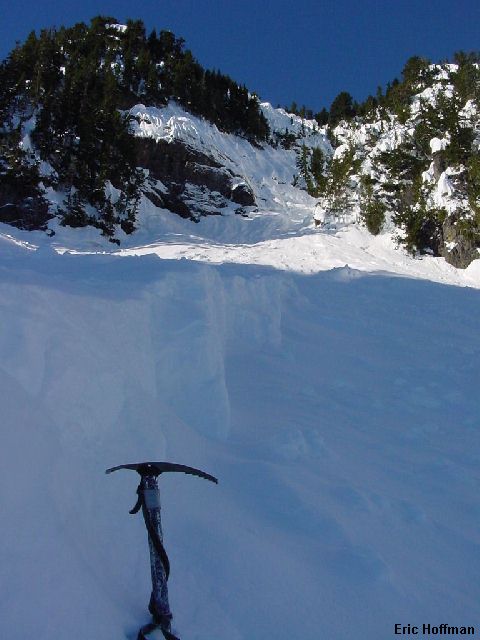
Avalanche Flank-all the way down to the infamous "January Crust" |
|
|
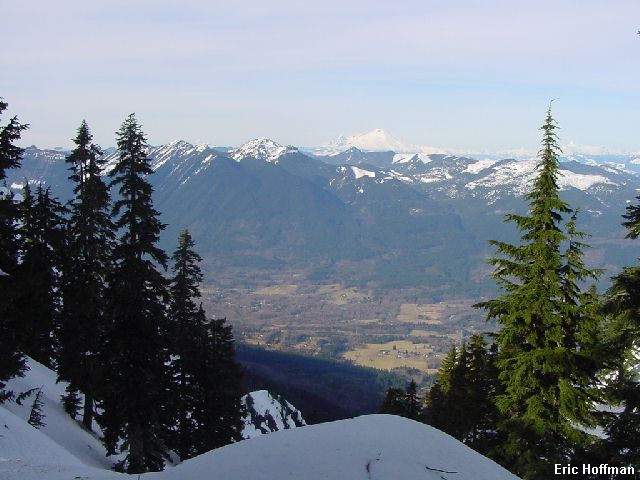
Getting to Lone Tree Pass (4973') is not difficult, but is moderately steep in places. There were several options available to get past the cornices at the pass. By the time I got there I had climbed more than 4000' and took a break to enjoy the view of Baker.
|
Mt. Baker from Lone Tree Pass |
|
|
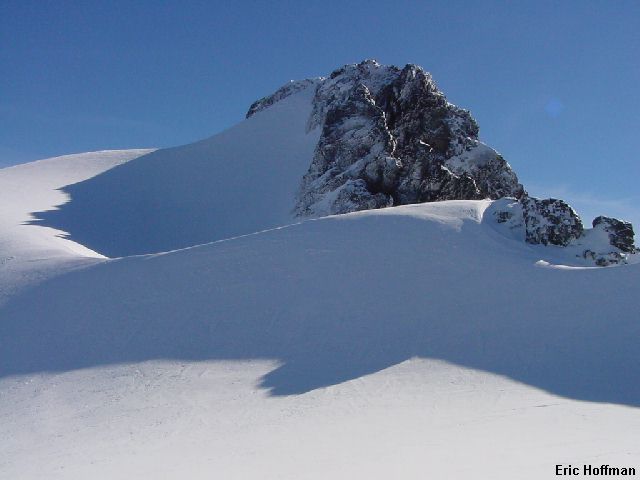
From Lone Tree Pass, follow the ridge east for about a half mile. One description said to follow the ridge until further progress is stopped by a buttress but I didn't see the point in going higher than about 5200 ft. and began descending SE until above the small basin with a lake mentioned in most descriptions of this route. You do not have to descend all the way to the basin before beginning a rising traverse below cliffs. The traverse is long and steep and continues until you can go no further without climbing a cliff. High Pass (6032') is located west of a prominent tower (pt. 6357'). A broad gully leads to the pass which allows easy access to the So-Bahti-Ahli Glacier, more commonly referred to as the Whitehorse glacier. As I was leaving High Pass, five climbers made their way over a roll in the glacier. The glacier was steep for a few hundred feet before leveling off. A few crevasses were showing but easily avoided.
|
The summit of Whitehorse Mtn from the So-Bahti-Ahli (aka Whitehorse)Glacier |
|
|
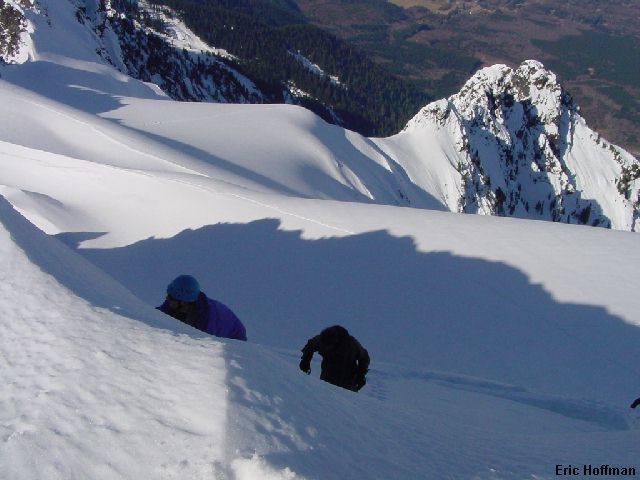
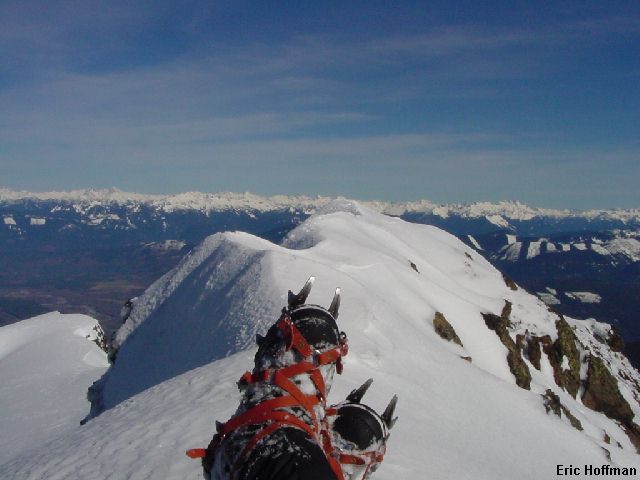
I made my way to the snow arete with the five climbers in hot pursuit. About 25 feet from the summit, I encountered a bergschrund that had to be outflanked on the right. The snow arete ended at a large ice covered boulder. To the left a short patch of water ice with a scary gully guaranteed to launch me into a rapidly decaying orbit around the summit if I fell. The right side was steeper snow with a bit of rock exposed and a steep snow slope below. Hmmm... I called to the climbers below hoping to take advantage of their rope...they didn't bring it for the one part of the route that you might actually need it! I probed the steep snow that separated me from the top. Probing turned to chopping with my rarely used adze. After hacking 3 feet of snow off the summit ridge an easy exit was made. The summit was just a few feet away on the narrow ridge.
|
"Route Pirates" climbing to the summit ridge |
|
|
|
What it's all about |
|
|
This route is long and strenuous with less room for error than many peaks but well worth the effort. Expect to ascend 6800 feet by the time it is all over on slopes averaging about 35 degrees. The traverse on the south side is tiring and the threat of falling ice is present much of the way. It took me 6 hours to reach the summit and more than three and a half to descend. Plan on spending an entire day on the route and be prepared to travel after dark if attempting this climb in one day.
References:
Cascade Alpine Guide, Volume 2, Second Edition; Fred Beckey; Pages 116-118
Selected Climbs In the Cascades, Volume 2; Jim Nelson, Peter Potterfield;
Pages113-117
100 Classic Backcountry Ski and Snowboard Routes in Washington; Rainer
Burgdorfer; Pages 102-105
Climbing Washington's Mountains; Jeff Smoot; Pages 107-111